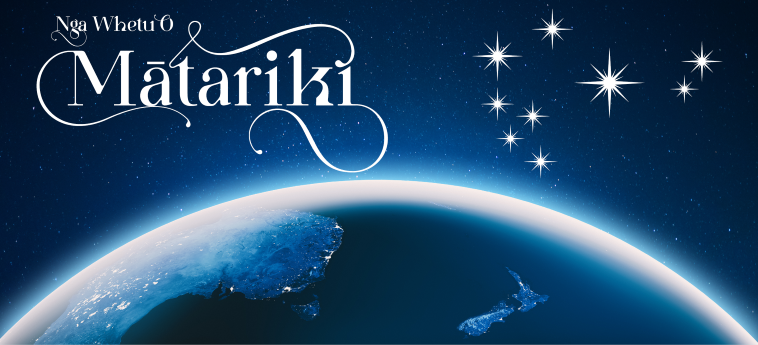
The Māori New Year, Matariki, is marked by the rise of the Pleiades star cluster Matariki, and the sighting of the next new moon.
Matariki begins to rise, appearing in the eastern sky, in the last few days of May and into June, and the timing is different every year.
Matariki has two meanings, both of which refer to the cluster of stars. Mata Riki means Tiny Eyes, and Mata Ariki means Eyes of God.
Although thousands of stars make up the Pleiades cluster, and there are technically nine stars that make up the constellation, there are just seven stars that you can make out with the naked eye.
It’s these seven stars that have traditionally been known as the Seven Sisters, or the Matariki. The Matariki star names are:
- Alcyone – Matariki, eyes of Tāwhirimātea
- Atlas – Tupu-ā-rangi, sky tohunga
- Electra – Waipuna-ā-rangi, sky spring
- Taygeta – Waitī, sweet water
- Pleione – Tupu-ā-nuku, Earth tohunga
- Merope – Ururangi, entry to the heavens
- Maia – Waitā, sprinkle of water
As we approach this time of the year again, there are lots of ways for you to celebrate Matariki with your friends and whānau – from amazing feasts to activities you can do with your tamariki. Here are some ideas on how you can bring in the Māori New Year!
Make Matariki crafts
Get the kids involved with some crafts to celebrate the new year. Thanks to www.kiwifamilies.co.nz for these two projects that will involve the whole whānau.
Fly a kite
Kites (manu aute) are often flown during Matariki as they are thought to flutter near the stars. Why not get the kids out and fly a kite together – or even have a go at making your own? It’s a perfect way to bring in Matariki together.
How to make a delta kite in 10 easy steps – (see www.kiwifamilies.co.nz/lets-go-fly-kite/)
You will need
- 1 metre of nylon parka material – available from shops like Spotlight
- Little metal rings about 10mm – also available from Spotlight, in the jewellery department ($3 for a packet)
- 8mm dowel – this will be cut into 4 pieces of roughly 54cm, 54cm, 42cm, 25cm
- String or nylon
- Sewing machine
Instructions
- Mark out a 100cm baseline.
Mark out the large triangle which will form the main part of the kite, making sure to leave a 2cm margin along the baseline and a 4cm margin along the other two sides.
At the midpoint of the baseline, erect a 45cm line at right angles to the baseline. Join the end of this 45cm line to the ends of the baseline.
- Cut out, making sure you don’t forget about the margins!
- Mark out a smaller triangle of 35cm x 17cm x 25cm, leaving a 2cm margin. Cut this triangle out.
- Fold and sew the 2cm margin along the baseline.
Fold and sew the 4cm margins along the other sides, leaving enough room to slide the dowel into these two sides.
Measure 54cm up from the ends of the baseline and sew across the seam to stop the dowel slipping to the end.
Fold and sew along the 17cm and 25cm sides of the little triangle.
- Fold the larger triangle in half along the baseline, and slip the smaller triangle in so that the longest part is right along the centre, with the 25cm side being closest to the baseline (see photos below). You now have a sandwich of 3 layers of material. Sew the three layers about 1cm from the centre line – this will secure the small triangle to the larger one and leave a tube to put in a piece of dowel.
- Measure and cut the dowel to fit into each side pocket and the centre one, then sew the seams shut to stop the dowel from falling out.
- Measure up from each corner of the baseline and make a small mark at 41cm just inside the seam. Sew two of the little rings onto these points. Sew the third on the tip of the small triangle.
- The last piece of dowel is the removable crosspiece; the ends need to be notched to receive the rings (check the photos online). You don’t want this too rigid, though, just tight enough so it won’t fall out. This will give you the flex you need for the kite to adjust to the wind.
- Lastly, tie your string, or nylon, onto the ring on the smaller triangle and wind the other end around a winder. You can now decorate the kite as you wish, with stickers, decals, or even some tiny LED lights if you want to give night flying a whirl!
- If the kite is a bit unstable, try moving the third ring back along the seam of the triangle.
Happy kite making, and hopefully happy kite flying too!
Hang a star
Gathering what you need for this star wall hanging is the perfect excuse for a winter excursion to the beach to collect supplies.
How to make a star wall hanging – (see www.kiwifamilies.co.nz/star-craft-project/)
You will need
3 pieces of driftwood (roughly the same size)
1 A4 sheet of felt
Glitter
Beads of your choice
String
Needles big enough for the string you have
Glue
Instructions
- Create a triangle with the pieces of driftwood and bind them together with string.
- Decide on the size of the stars you would like to use and cut them out of the felt.
- Glue and glitter the front and back of each star.
- Once the glue is dry, attach any embellishments to the stars using a needle and thread.
- Dip any feathers you have in glue halfway and add glitter to them, then add these to your stars.
- Tie the stars to your driftwood.
- Finally, tie a piece of string to the top of the star hanging and display it on the wall.
Sing and dance
No Matariki celebration is complete without some singing and dancing. Have a go at singing this Matariki waiata from Te Papa with your tamariki and learn the names of the seven Matariki stars.
Ngā Tamariki o Matariki
Waitī, Waitā, Waipunarangi,
Tupu-ā-nuku, Tupu-ā-rangi, Ururangi e
Koinei ngā tamariki o Matariki
(These are the children of Matariki)
Ngā whetū e pīataata i te rangi e
(The bright stars that shine in the sky)
Ngā whetū e pīataata i te rangi e
(The bright stars that shine in the sky)
Listen to the song here: https://www.tepapa.govt.nz/discover-collections/read-watch-play/maori/matariki-maori-new-year/whare-tapere/waiata-song
Share a family feast
Matariki has such a strong connection with kai. The Matariki stars appeared in the night sky just after harvest when food stores were plentiful. Matariki is a time of renewal and celebration, a time to reflect, plan ahead and enjoy delicious meals with whānau and friends.
Why not try out this Paraoa parai (fry bread) recipe – courtesy of New World
- 3 cups high grade flour
- 2 tsp instant yeast
- 1/2 tsp sugar
- 1 tsp salt
- 2 cups warm water
- Vegetable or rice bran oil, for frying
Method
- In a bowl, mix together the flour, yeast, sugar and salt. Slowly add the warm water while mixing until a soft dough forms.
- Turn the dough onto a floured surface and knead for 5 minutes or until the dough is smooth. Transfer to an oiled bowl, cover, and leave to proof in a warm place for 45–60 minutes or until doubled in size.
- Once the dough has doubled in size, place onto a floured surface and roll out to a 1–2cm thickness.
- Cut into your desired shapes or number of pieces, then deep fry for 2–3 minutes or until golden brown and fluffy in the centre. Once cooked, place onto a wire rack set on a lined tray to drain.
- Serve the bread alongside your favourite sides or with your desired toppings.